Are you intrigued by flaky Swiss pastries that melt in your mouth? Then you’ve come to the right spot. In this article, we’ll walk you through a gipfeli recipe that will bring authentic Alpine charm to your kitchen. We’ll explore its cultural background, cover detailed ingredients, and discuss step-by-step methods so you can confidently bake your own batch of golden crescents. Moreover, we’ll share tips for storing, serving, and customizing these pastries. By the end, you’ll know exactly how to craft gipfeli recipe pastries that are both fluffy and irresistibly layered. Let’s begin this baking adventure together!
1. Introduction to the Gipfeli Recipe
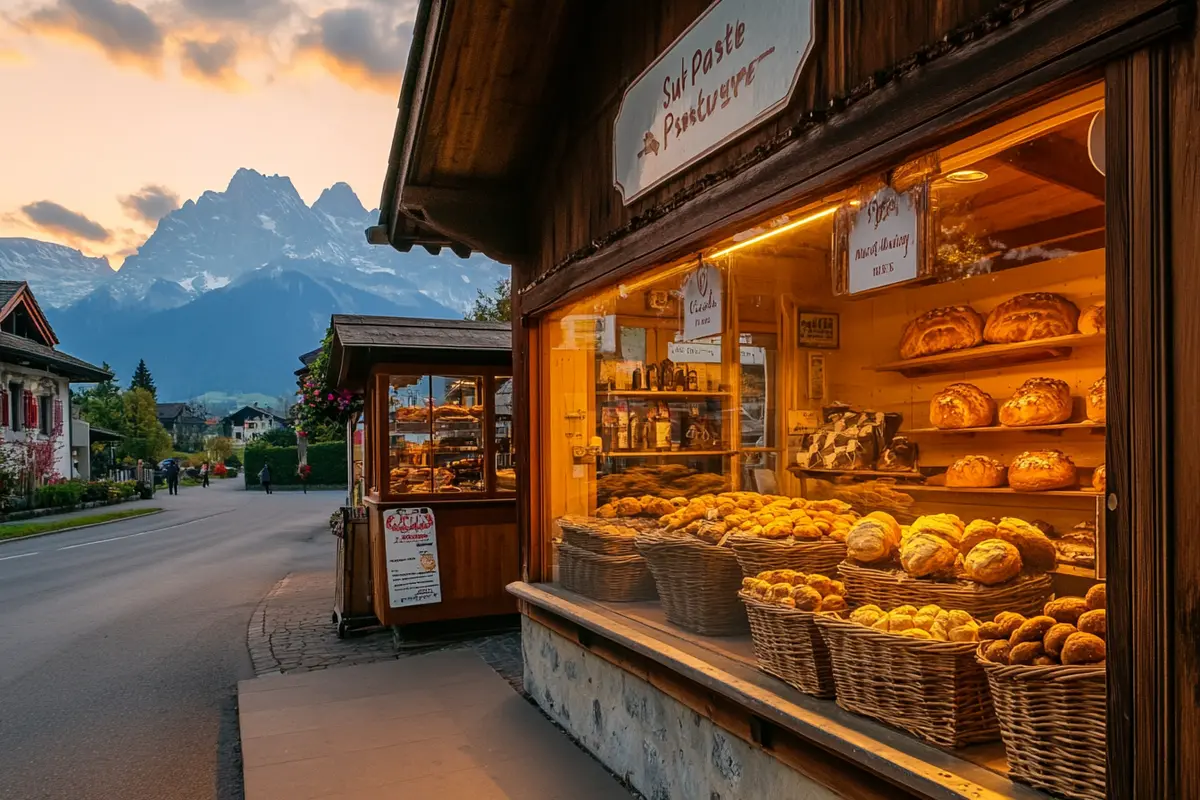
Switzerland is famous for its breathtaking landscapes, meticulous craftsmanship, and delicious baked goods. One of the country’s prized treats is the gipfeli recipe, a pastry often compared to a French croissant. However, Swiss bakers typically use a slightly different dough and shaping method. The result is a pastry that has a crisp exterior and a soft, subtly sweet interior. While traveling through Switzerland, you’ll see these pastries displayed in bakery windows, especially in the early mornings.
But do you need a Swiss passport to enjoy them daily? Certainly not. You can replicate the taste of Switzerland in your own home. Whether you’re a baking novice or an experienced pastry enthusiast, this guide has you covered. We’ll delve into everything from selecting the best flour to troubleshooting dough that refuses to rise. After all, baking is part science, part art. With a bit of patience and practice, you’ll soon achieve that light, puffy texture that defines a perfect gipfeli recipe.
2. Understanding Swiss Pastry Culture
It helps to learn a bit about Swiss pastry culture before diving deeper into the gipfeli recipe. At many Swiss cafés, freshly baked pastries play a crucial role in the morning routine. Locals might pair a warm pastry with a cup of coffee or hot chocolate, savoring the comforting flavors. Indeed, Swiss people take pride in using fine ingredients, such as high-grade butter and flour, to create dough that’s both tender and robust.
However, Swiss baking differs from region to region. Some areas prefer a slightly sweeter dough, while others keep sugar to a minimum. Essentially, each region adds its own twist to the basic foundation. Yet, the love for flaky, butter-kissed pastries remains constant. This focus on tradition is what shapes the gipfeli recipe into something truly special. Consequently, even if you vary a few details, the heart of the pastry continues to reflect Swiss devotion to quality and craftsmanship.
3. The Unique Charm of a Gipfeli
A true gipfeli recipe yields more than just a croissant clone. Many who’ve sampled both notice that Swiss crescents have a milder, more understated flavor. They also feature a shape that can be slightly straighter than the classic French croissant. In addition, the dough often incorporates a touch less butter than French pastry dough does. That said, there’s still enough richness to create lovely, flaky layers when baked.
Moreover, the gipfeli recipe includes a gentle sweetness that complements jams and preserves nicely. This subtle balance sets them apart from purely savory rolls. Once you bite into a well-baked Swiss crescent, you’ll notice the crisp outer shell giving way to a tender, airy interior. If you close your eyes, you might even imagine yourself at a small bakery nestled among Swiss Alps, taking in the fresh morning air.
4. Key Ingredients in a Traditional Gipfeli Recipe
Every pastry begins with the right combination of ingredients. While slight variations exist, the following basics remain crucial for an authentic gipfeli recipe:
- All-Purpose Flour (4 cups / 500 g)
- Choose a high-quality brand to ensure a consistent protein content.
- The protein ensures enough gluten development for a manageable dough.
- Active Dry Yeast (2 ¼ teaspoons / 7 g)
- Helps the dough rise and lends a slight tangy note.
- Check the expiration date for reliable fermentation.
- Granulated Sugar (¼ cup / 50 g)
- Enhances flavor and fuels yeast growth.
- Some Swiss bakers use a bit less sugar, while others use more.
- Salt (1 ½ teaspoons / 8 g)
- Balances sweetness and underlines the dough’s depth.
- Regulates yeast activity to prevent overly fast fermentation.
- Milk (1 cup / 240 ml, lukewarm)
- Adds moisture and tenderness.
- Lukewarm temperatures help yeast activate quickly.
- Egg (1 large)
- Contributes richness and structure.
- Encourages a softer crumb in the final product.
- Unsalted Butter (8 tablespoons / 113 g, cold)
- Produces flaky layers when folded into the dough.
- Chilled butter is easier to layer without melting prematurely.
- Egg Wash (1 additional egg)
- Creates a shiny, golden top layer during baking.
- You can also add a small splash of milk for smoother brushing.
These ingredients fuse to form the classic base. Occasionally, you may see recipes that call for a bit of cream or fewer eggs, but the eight listed components above remain standard. Remember to measure precisely for best results, especially if you’re a beginner.
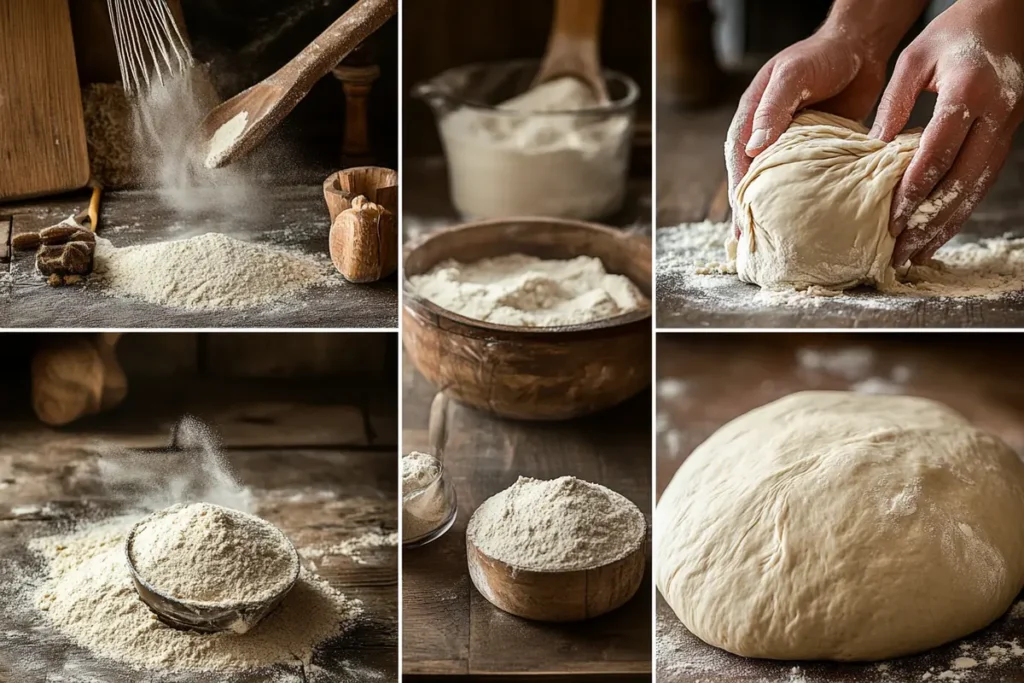
5. Step-by-Step Dough Preparation

Most beginners assume that a gipfeli recipe is complicated. However, the steps are actually straightforward once you break them down. The main tasks involve mixing, resting, folding, proofing, and baking. Let’s walk through each part, starting with dough prep.
- Activating Yeast
- Warm the milk so it feels slightly above body temperature—around 100–110°F.
- Stir in the active dry yeast and a pinch of sugar.
- Let it sit for about 5 minutes. Once it turns frothy, you know the yeast is alive and ready.
- Combining Dry Ingredients
- In a large bowl, whisk together the flour, sugar, and salt.
- You can also use a stand mixer fitted with a dough hook.
- Making the Dough
- Pour the yeast mixture into the bowl along with one beaten egg.
- Begin mixing on low speed or by hand. If kneading manually, start with a wooden spoon before switching to your hands.
- Kneading
- Knead the dough until it forms a smooth, supple ball.
- Aim for a texture that’s not sticky yet not overly stiff.
- If needed, add tiny increments of flour or milk to adjust consistency.
- Initial Rest
- Lightly oil a clean bowl, place your dough inside, and cover it.
- Allow it to rise in a warm spot for 1–1.5 hours, or until roughly doubled in size.
During these initial stages, patience is key. The yeast needs time to develop carbon dioxide and stretch the dough’s gluten strands. Meanwhile, the dough’s mild sweetness and subtle saltiness begin to meld, creating an inviting aroma even before it goes into the oven.
6. Mastering the Folding Technique
Once your dough completes its first rise, you’ll move on to the folding process—the pivotal difference between an average roll and a layered gipfeli recipe. While the technique may seem intimidating, don’t fret. You just need to keep your butter cold and your dough chilled as necessary.
- Preparing the Butter
- Remove your chilled butter from the fridge.
- Place it between two sheets of parchment or plastic wrap.
- Tap it gently with a rolling pin to flatten it into a thin rectangle.
- Rolling the Dough
- Punch down the risen dough to release excess air.
- On a lightly floured surface, roll it into a rectangle roughly 12 by 8 inches.
- If your dough shrinks back, let it rest for a few minutes before trying again.
- Enclosing the Butter
- Position the flattened butter in the center of the dough rectangle.
- Fold each side of the dough over the butter, ensuring a complete seal.
- Gently roll out this butter-filled parcel to increase its length.
- Folding Rounds
- Fold the dough into thirds, like folding a letter.
- Wrap it in plastic and chill for about 20–30 minutes.
- Repeat this process one or two more times, depending on how many layers you’d like.
By systematically folding butter into the dough, you create many thin layers. When baked, steam from the butter lifts the dough, forming that flaky structure. The key is to keep everything cold. If the butter melts, you lose distinct layers and end up with a dense pastry.
7. Proofing and Shaping: The Swiss Art
Now that you’ve folded the dough, it’s time for the second shaping. This step truly defines the look of your gipfeli recipe.
- Rolling Out
- Roll the dough again into a rectangle, about 16 by 10 inches.
- Aim for a thickness of roughly a quarter-inch.
- Cutting Triangles
- With a sharp knife, slice triangles along the length of the dough.
- The base of each triangle should be around 3 inches wide.
- Adjust the size if you prefer mini pastries or extra-large crescents.
- Forming Crescents
- Gently pull on the two bottom corners to slightly widen them.
- Roll the triangle from the base upward toward the tip.
- Curve the ends into that distinctive half-moon shape.
- Second Proof
- Transfer the shaped pastries to a baking sheet lined with parchment.
- Cover them with a clean cloth or plastic wrap.
- Let them rise for 30–45 minutes, or until they look puffy and airy.
- Egg Wash
- Beat the second egg with a teaspoon of water or milk.
- Lightly brush each pastry’s surface, avoiding drips onto the parchment.
- This wash provides a glossy, golden finish during baking.
During this stage, a warm, draft-free environment can accelerate the second proof. You want them to expand, but not balloon so large that they lose shape. Keep an eye on them. The moment they feel soft to the touch and look slightly bigger, you’re ready for the oven.
8. Baking Your Gipfeli to Perfection
Baking is where your patience pays off, and your house will fill with the tempting scent of warm pastry. Here’s how to nail it:
- Preheating
- Set your oven to 375°F (190°C).
- Let it heat thoroughly for at least 10 minutes before inserting pastries.
- Placement
- Gently place the tray of pastries on the middle rack.
- If you’re using multiple trays, position them so air circulates well.
- Time and Temperature
- Bake for 15–20 minutes, or until the pastries turn medium-golden brown.
- Avoid opening the oven door frequently, as temperature drops can hamper an even rise.
- Checking Doneness
- The pastries should sound hollow if you tap their bottoms lightly.
- A uniform color across the exterior suggests they’re fully baked.
- If they remain pale, keep them in for an extra 2–3 minutes, monitoring closely.
- Cooling
- Remove the tray from the oven and transfer pastries to a cooling rack.
- They’ll feel extra delicate at first, but they’ll firm up slightly as they cool.
Baking times can differ slightly per oven, so watch carefully. The color often reveals more than a strict timer. Once you find your sweet spot, note it down for future reference. And remember, the gipfeli recipe thrives on precise baking, so aim for that perfect golden shade.
9. Flavor Variations: Sweet, Savory, and More
Sticking to a standard gipfeli recipe is wonderful. However, variety can keep your baking exciting. Below are some ideas to customize your pastries:
- Chocolate-Filled
- Place a small chocolate baton or a few chocolate chips in the center of each triangle.
- Roll as normal, ensuring you seal the ends to prevent leaks.
- Cheese and Herbs
- Sprinkle shredded Gruyère or cheddar on the dough before cutting.
- Dust with chopped fresh herbs like rosemary or thyme.
- Roll into crescents for a savory twist.
- Almond Paste
- Spread a thin layer of almond paste or marzipan on each triangle.
- This approach pairs nicely with a light dusting of powdered sugar post-bake.
- Ham and Cheese
- Lay a slice of ham along the base of each triangle, plus grated cheese.
- Create a quick breakfast option that’s extra hearty.
- Sweet Glaze
- After baking, drizzle a sugar glaze (milk, powdered sugar, and vanilla) over the pastries.
- Perfect for dessert or special occasions.
When experimenting, keep the ratio of added ingredients moderate so the pastry structure remains intact. If a filling is too wet, consider sprinkling cornstarch or flour on it to absorb moisture. The beauty of the gipfeli recipe lies in its adaptability, so feel free to explore.
10. Serving Suggestions and Occasions
A freshly baked batch of gipfeli recipe pastries can brighten anyone’s day. Here’s how you might serve them:
- Breakfast Table
- Pair them with jam, honey, or butter.
- Add a strong coffee, cappuccino, or tea for a classic Swiss start.
- Brunch Buffet
- Offer sweet and savory variations alongside fruit salad, scrambled eggs, or cold cuts.
- Guests can sample multiple flavors for a fulfilling meal.
- Afternoon Tea
- Slice them horizontally and layer with whipped cream and fresh berries.
- A classy alternative to scones for a British-inspired tea session.
- On-the-Go Snack
- Wrap a couple of pastries in parchment if you’re running errands.
- They make a convenient treat during long drives or while traveling.
- Festive Gatherings
- Decorate them with edible glitter or tiny sugar pearls for a holiday vibe.
- Use a swirl of red and green icing if you’re celebrating Christmas.
The gipfeli recipe can also serve as a thoughtful homemade gift. Bundle a few pastries in a decorative box or basket. Your friends and family will appreciate the personal touch.
11. Common Problems and Easy Solutions
Despite your best efforts, sometimes things go awry. Here’s how to overcome typical gipfeli recipe hurdles:
- Dough Too Sticky
- Check if you measured flour correctly.
- Lightly dust your work surface or knead in a small amount of extra flour.
- Avoid adding too much at once, as dryness can cause crumbly results.
- Dough Not Rising
- Verify that your yeast isn’t expired.
- Ensure the temperature for proofing is warm but not overly hot.
- If your kitchen is cold, consider placing the bowl near a slightly heated oven.
- Butter Oozing Out
- Chill your dough more frequently during the folding process.
- Confirm the butter is cold, not soft or melted.
- Roll gently to avoid rupturing the dough layers.
- Undercooked Centers
- Lower oven temperature slightly and extend the bake time.
- This helps the interior cook thoroughly without scorching the surface.
- Excessive Browning
- Move the baking tray down a rack or reduce oven temperature by 10–15 degrees.
- Check that your egg wash isn’t pooling or browning prematurely.
These simple fixes can often rescue a struggling batch. Stay calm and approach each misstep as a learning opportunity. Baking is a skill that develops over time, and each challenge conquered is a small victory for your technique.
12. Storing, Reheating, and Maintaining Freshness
You might not finish your entire gipfeli recipe batch in one day. That’s okay—these pastries can stay fresh if you store them properly.
- Room Temperature
- Keep them in a sealed container or plastic bag for up to two days.
- The outer layer may lose some crispness but will remain tasty.
- Freezing
- Freeze shaped, unbaked pastries if desired.
- When ready to bake, thaw them in the fridge overnight and proceed with the final proof.
- Alternatively, freeze fully baked pastries, then reheat as needed.
- Reheating
- Warm them in a 300°F (150°C) oven for 5–8 minutes.
- This method restores flakiness better than microwaving, which can cause sogginess.
- Reviving Crunch
- If your stored pastries feel soft, toast them lightly in a countertop oven.
- Enjoy them as if freshly baked.
Avoid leaving them uncovered on the counter for extended periods, as they’ll dry out. Also, keep in mind that butter-rich pastries pick up flavors from other foods. If your fridge holds strong-smelling leftovers, store your gipfeli recipe pastries in airtight packaging. That precaution helps preserve their delicate flavor.
13. The Joy of Sharing Homemade Gipfeli
Homemade pastries often draw smiles from friends and family. There’s something heartwarming about offering a basket of warm gipfeli recipe crescents to guests or neighbors. Whether you’re hosting a birthday, holiday brunch, or just a casual coffee date, these pastries add a special touch. Moreover, teaching loved ones how to make them can become a memorable bonding experience in the kitchen. Rolling dough side by side, folding butter layers, and laughing over flour-dusted aprons fosters closeness.
In many Swiss homes, children learn basic dough handling early. The tradition of passing down culinary knowledge ensures that recipes like these remain part of daily life. When you share a homemade pastry, you’re not just giving someone food. You’re offering them a piece of Swiss heritage, a testament to the artistry behind each layer.
Encourage others to try their hand at a gipfeli recipe, even if they’re new to baking. Guide them through kneading, shaping, and patience during proofing. And if at first they don’t succeed, there’s always the chance to savor the taste anyway. After all, even the “less-than-perfect” pastries can still be devoured happily with a smear of jam.
14. Conclusion
Ultimately, this gipfeli recipe invites you to create a slice of Switzerland wherever you live. Indeed, these pastries blend tradition, flavor, and technique into each bite. From mixing flour and yeast to carefully laminating butter between dough layers, every step shapes a truly special treat. While the process might seem detailed, consistent practice will lead to delicious, golden results. Consequently, your friends and family will line up for just one more taste. Whether you stick to the classic approach or explore fillings like chocolate or cheese, let your creativity shine. Most importantly, remember that each puff of steam and every crisp layer in a gipfeli recipe signals the warmth and delight of homemade baking. So gather those ingredients, roll up your sleeves, and embrace the simple joy of freshly baked Swiss crescents in your own kitchen.
For more recipes : Chex Mix Recipe Oven: Irresistibly Crunchy Snack