Classic Tuna Melt Recipe — Crispy, Cheesy, and Comforting
When it comes to quick, satisfying lunches, nothing beats a Tuna Melt. It’s the perfect mix of creamy, cheesy, and crispy textures — the ultimate comfort sandwich. With a rich tuna salad filling, golden-toasted bread, and gooey melted cheese, this sandwich is simple yet indulgent. Whether you’re craving something nostalgic or looking for a quick weekday meal, a tuna melt is always a hit.
The Secret Behind a Perfect Tuna Melt
A great tuna melt depends on two things — the filling and the melt. The tuna mixture should be creamy but not soggy, with just the right balance of mayonnaise, crunch from celery, and tang from lemon juice. Then, perfectly toasted bread seals it all together, while the cheese melts into every bite. The combination of creamy and crispy textures creates that irresistible harmony that makes this sandwich so satisfying.
Ingredients List
-
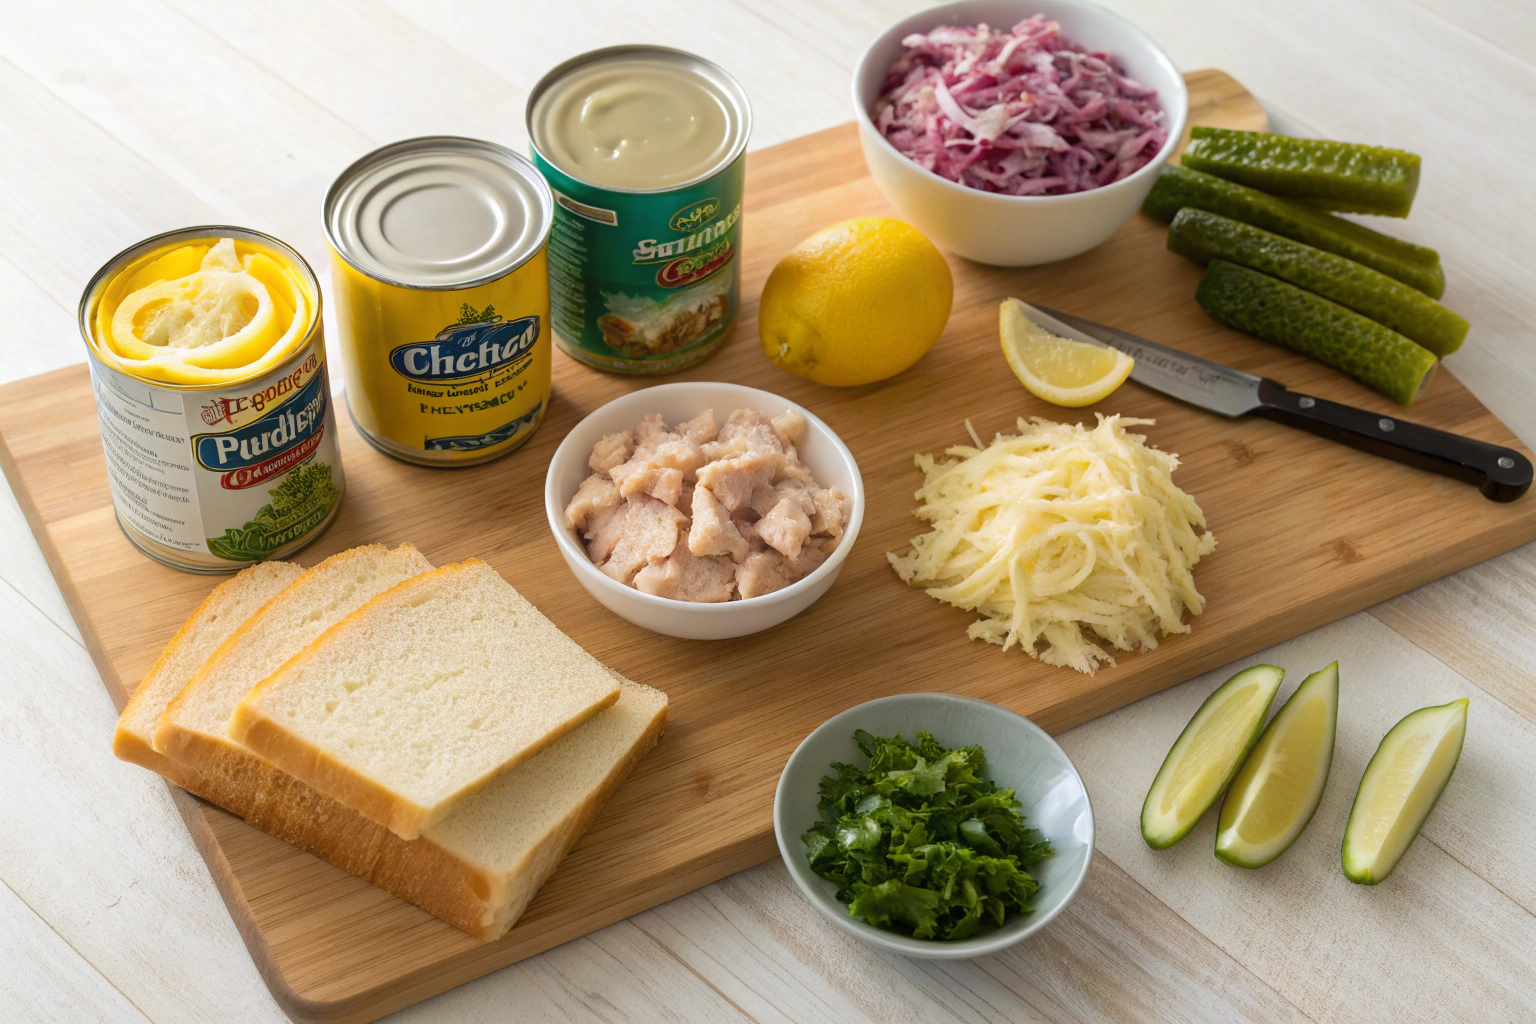
2 cans (5 oz each) tuna in water, drained well
-
1/3 cup mayonnaise
-
1 tablespoon lemon juice
-
1/4 cup finely diced celery
-
2 tablespoons finely diced red onion
-
1/4 teaspoon black pepper
-
1/8 teaspoon salt
-
4 slices sandwich bread (sourdough, rye, or white)
-
4 slices cheddar cheese (or Swiss for milder flavor)
-
2 tablespoons unsalted butter, softened
-
Optional: sliced pickles or tomato for layering
Step-by-Step Instructions
Step 1: Prepare the Tuna Mixture
-
In a medium bowl, combine tuna, mayonnaise, lemon juice, celery, red onion, salt, and pepper.
-
Mix until creamy and evenly blended.
-
Taste and adjust seasoning — add more lemon for brightness or mayo for richness.
Pro Tip: Drain the tuna thoroughly to avoid a soggy sandwich.
Step 2: Assemble the Sandwich
-
Lay out four bread slices.
-
Spread butter on one side of each slice.
-
On the unbuttered side of two slices, spread a generous layer of tuna mixture.
-
Add a slice of cheddar cheese on top.
-
Place the remaining slices on top, buttered side facing out.
Step 3: Grill the Tuna Melt
-
Heat a nonstick or cast-iron skillet over medium heat.
-
Place the sandwiches in the skillet and cook for about 3–4 minutes per side, or until golden brown and crisp.
-
Press gently with a spatula to help the cheese melt evenly.
Pro Tip: Cook slowly over medium heat so the cheese melts without burning the bread.
Step 4: Serve and Enjoy
-
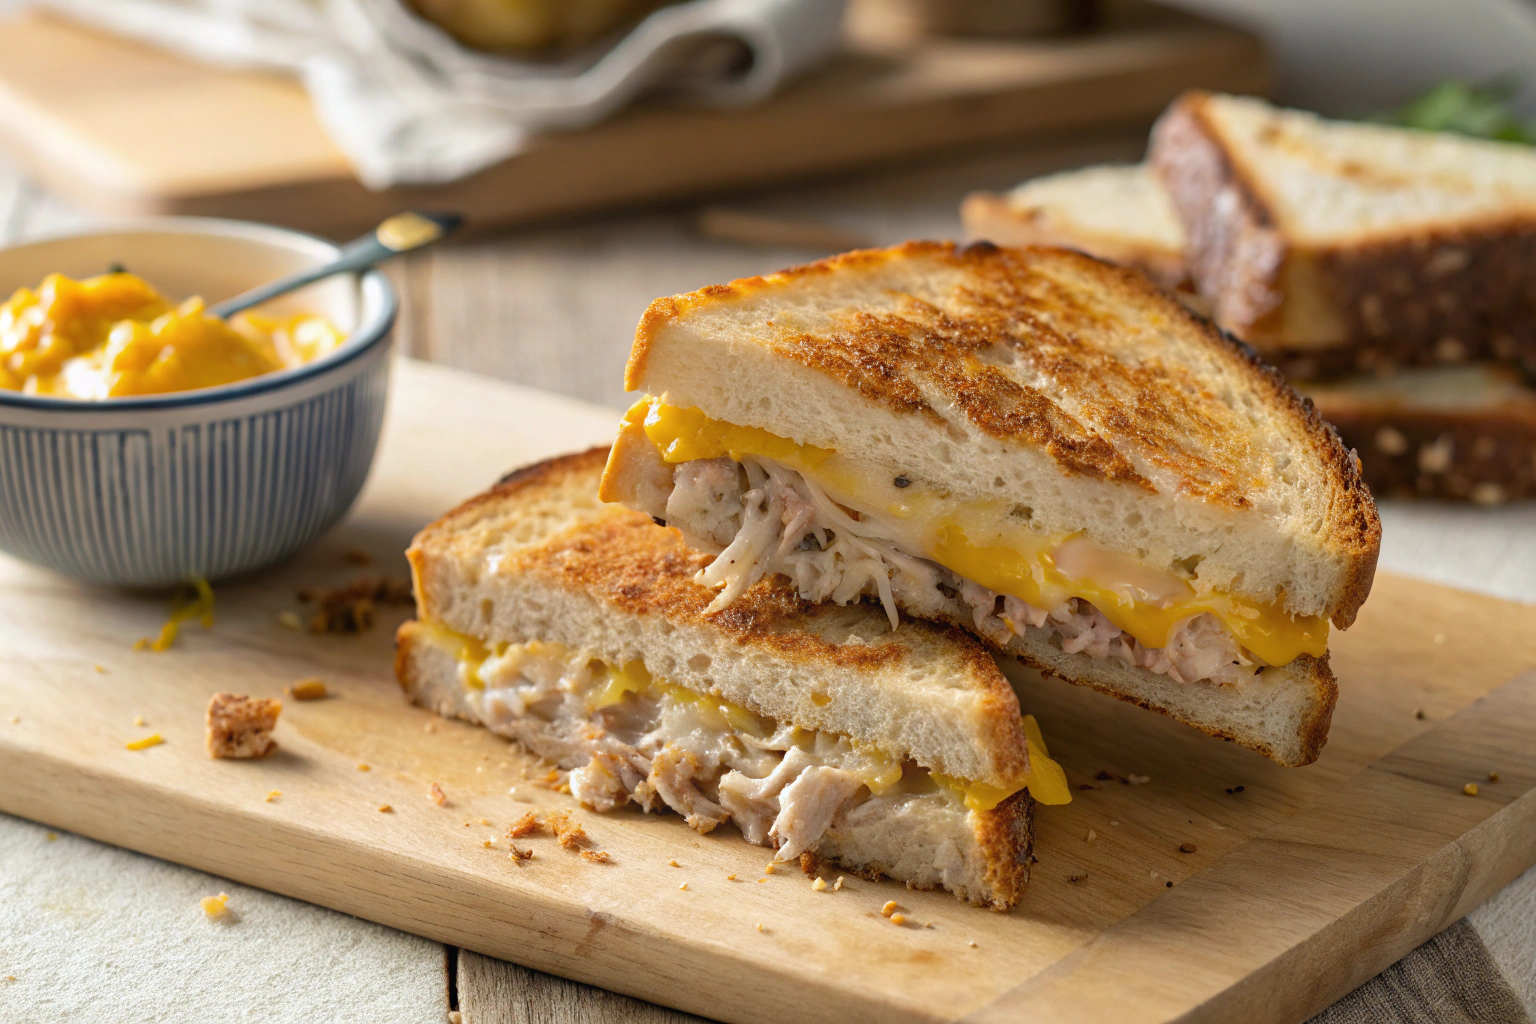
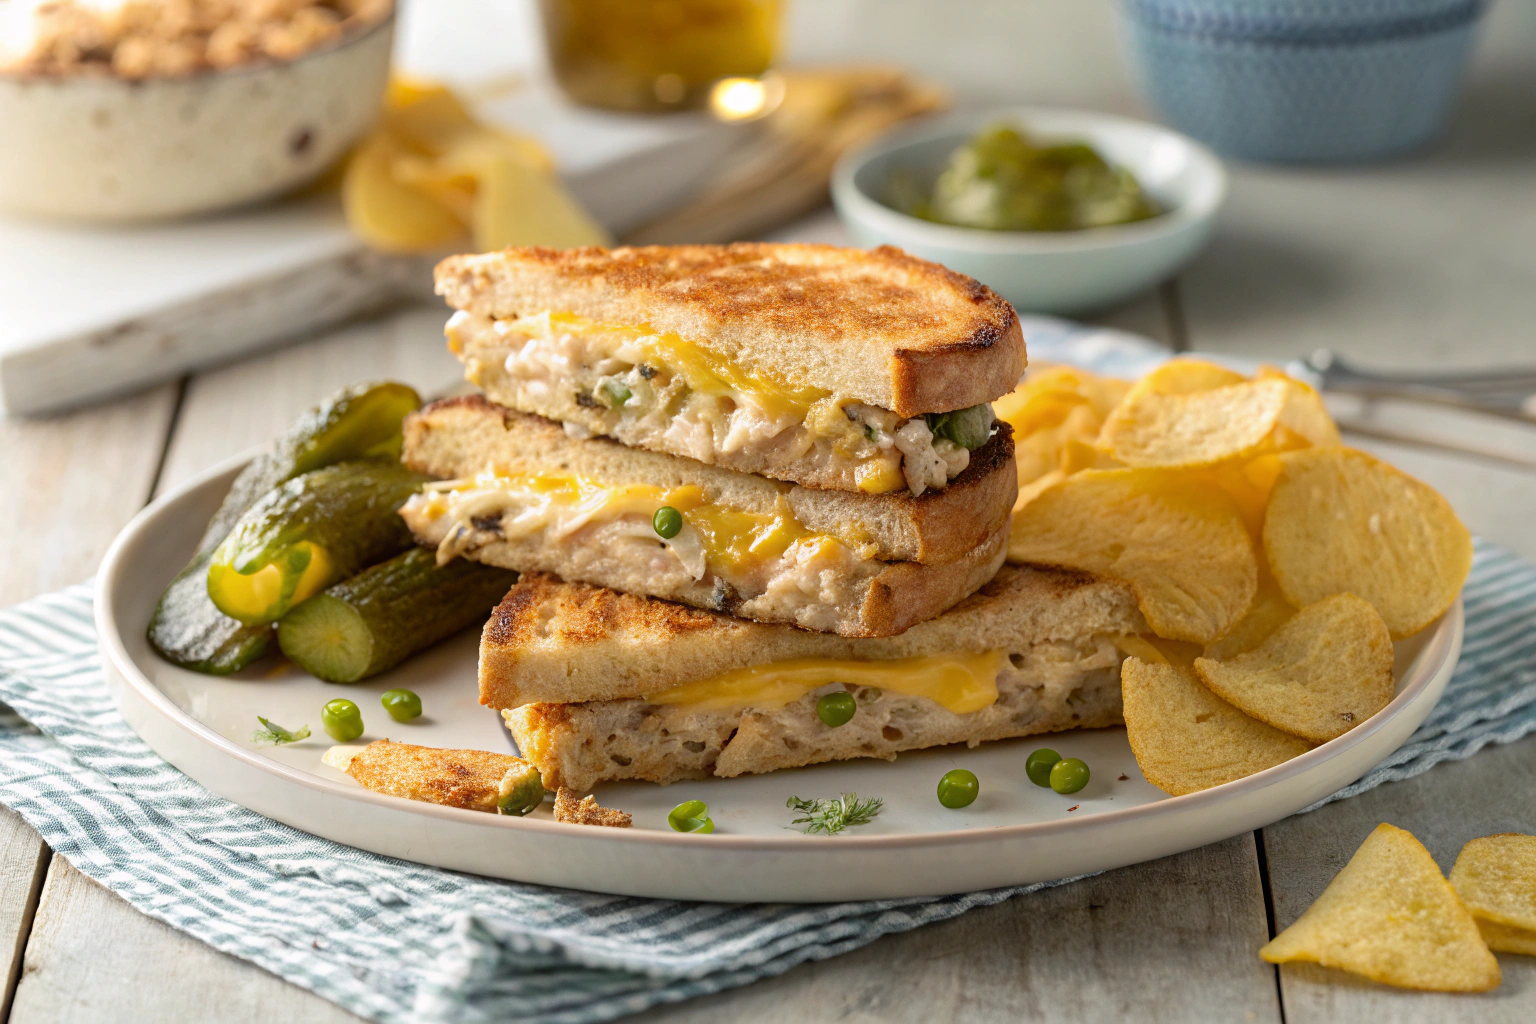
Cut each sandwich in half diagonally.
-
Serve hot with a side of pickles, chips, or tomato soup for the ultimate comfort combo.
Presentation Idea: Stack the halves slightly apart on a rustic wooden board, letting the melted cheese show for that irresistible “pull-apart” look.
Flavor Variations
-
Spicy Tuna Melt: Add diced jalapeños or a few dashes of hot sauce to the tuna mixture.
-
Garlic Lovers: Mix in a pinch of garlic powder or spread garlic butter on the bread before toasting.
-
Avocado Tuna Melt: Add avocado slices inside the sandwich for a creamy twist.
-
Italian-Style: Use mozzarella and sprinkle a little dried oregano before grilling.
-
Open-Faced Version: Toast the bread first, then top with tuna salad and cheese; broil until melted and bubbly.
Storage & Reheating Tips
-
Store leftover tuna mixture (unassembled) in an airtight container in the refrigerator for up to 3 days.
-
Do not store assembled sandwiches — the bread becomes soggy.
-
To reheat a pre-made melt, warm it in a skillet over low heat or in the oven at 350°F for 10 minutes until hot and crisp again.
Common Mistakes & How to Avoid Them
-
Over-toasting the bread: Medium heat ensures the cheese melts without burning the exterior.
-
Too much mayo: Excess moisture can make the filling heavy. Use just enough for creaminess.
-
Using low-quality tuna: Choose solid white albacore or chunk light tuna for best flavor.
-
Rushing the melt: Allow time for cheese to melt completely — slow and steady wins the melt game.
Why This Recipe Works
-
Combines crisp, golden bread with creamy, tangy filling.
-
Easy to prepare with pantry staples.
-
Versatile — customize with your favorite add-ins.
-
Perfect for lunch, brunch, or a quick dinner.
-
Comforting, nostalgic, and ready in under 20 minutes.
Final Thoughts
The Tuna Melt is proof that comfort food doesn’t need to be complicated. With just a few simple ingredients and a little care, you can make a sandwich that’s warm, melty, and full of flavor. Whether it’s a cozy weekend lunch or a quick weekday meal, this recipe always delivers the perfect bite — crisp on the outside, creamy on the inside, and deeply satisfying every time.