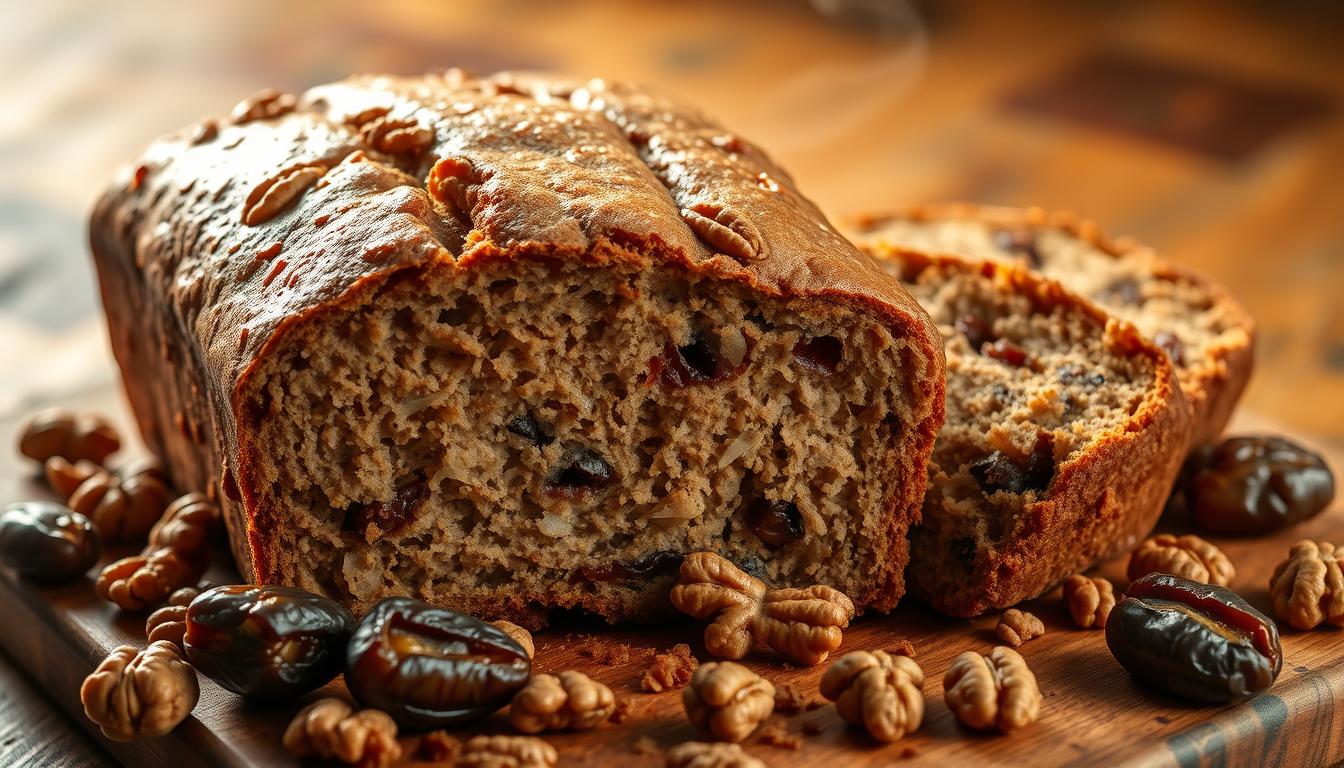
Are you searching for a tasty and moist bread for a snack or dessert? Our easy date nut bread is perfect for any event.
Making this date nut bread recipe is simple. It only needs a few ingredients and basic baking skills. Follow our guide to make a flavorful and aromatic bread that will wow your loved ones.
Key Takeaways
- Learn how to make a delicious date nut bread
- Understand the ingredients and preparation required
- Get tips for achieving the perfect consistency
- Discover how to store your bread for maximum freshness
- Follow a simple step-by-step guide to baking
Understanding Date Nut Bread
Date nut bread is loved for its rich flavors and health benefits. It’s not just tasty but also full of nutrients. This makes it a great choice for your meals.
What is Date Nut Bread?
Date nut bread is a sweet bread made with dates, nuts, and more. It’s great for breakfast or as a snack. Enjoy it with coffee or tea for a special treat.
Health Benefits of Date Nut Bread
Date nut bread is a healthy choice. Dates are full of fiber, potassium, and antioxidants. Nuts add healthy fats and protein. This makes the bread both tasty and nutritious.
- Rich in Fiber: Dates help with digestion and keep you full.
- Antioxidant Properties: Dates protect cells from damage.
- Good Source of Healthy Fats: Nuts are good for your heart.
Adding date nut bread to your diet is a smart move. It’s a delicious and healthy snack for any time.
Ingredients You’ll Need
To bake a moist and flavorful date nut bread, you need the right ingredients. A simple date nut bread recipe requires both key ingredients and optional add-ins. Let’s explore what you’ll need.
Essential Ingredients
The heart of your homemade date nut bread is its essential ingredients. You’ll need:
- Dates: Pitted and chopped, they provide natural sweetness.
- Nuts: Chopped nuts like walnuts or almonds add crunch.
- Flour: All-purpose flour is a good starting point.
- Sugar: Brown sugar or white sugar can be used based on preference.
- Spices: Cinnamon or nutmeg can add a warm flavor.
- Liquids: Eggs, milk, or butter contribute to moisture.
| Ingredient | Quantity | Purpose |
|---|---|---|
| Dates | 1 cup, chopped | Natural sweetness |
| Nuts | 1/2 cup, chopped | Texture and flavor |
| Flour | 2 cups | Structure |
| Sugar | 1/2 cup | Sweetness |
| Spices | 1 tsp (e.g., cinnamon) | Flavor enhancement |
Optional Add-ins
To make your date nut bread unique, consider adding:
- Dried cranberries for a fruity twist.
- Chocolate chips for a sweet surprise.
- Coconut flakes for added texture.
These optional add-ins let you try different flavors. This way, your simple date nut bread recipe can be truly special.
Preparing Your Ingredients
To make your date nut bread perfect, you must prepare your ingredients carefully. This step is key to creating the best date nut bread recipe. It ensures your bread is both tasty and moist.
How to Choose the Right Dates
Choosing the right dates is crucial for a moist date nut bread. Go for high-quality, soft, and fresh dates. Pitted dates are best as they save you time.
Think about the type of dates you like. Medjool dates are popular for their rich flavor and texture. But, try different types to find your favorite.
Chopping Nuts and Other Preparations
Chopping nuts is a key step. You want them chopped finely but not too small. Walnuts and pecans are great choices for their flavor and crunch.
Also, measure your flour, sugar, and spices carefully. Being precise with measurements is important for the right flavors. Sifting dry ingredients helps for a better texture in your bread.
- Measure ingredients accurately
- Sift dry ingredients for better texture
- Chop nuts to the right consistency
By carefully preparing your ingredients, you’re ready for a great baking experience. Your date nut bread will be delicious and have a wonderful texture. It’s sure to be a hit!
Mixing the Batter
Now that you have your ingredients ready, it’s time to mix them into a smooth batter. This step is key for the right texture and taste in your date nut bread.
Step-by-Step Instructions
Begin by creaming the butter and sugar until they’re light and fluffy. This step adds air to the batter, making it tender.
Then, add the eggs one at a time, beating well after each. This makes sure the eggs are fully mixed and the batter stays smooth.
- Add the chopped dates and nuts, folding them into the batter gently to distribute them evenly.
- In a separate bowl, whisk together the flour, baking powder, and salt. Gradually add this dry mixture to the wet ingredients, mixing until just combined.
- Be careful not to overmix, as this can result in a dense bread.
Tips for Achieving the Perfect Consistency
The batter’s consistency is crucial for a great date nut bread. Here are some tips to get it right:
- Check the batter’s consistency: It should be thick but still pourable. If it’s too dry, add a little more milk or water. If it’s too wet, add a bit more flour.
- Don’t overmix: Overmixing can make the bread tough. Stop mixing as soon as the ingredients are combined.
- Use the right tools: A stand mixer or a wooden spoon can be used for mixing. A stand mixer makes the job easier, but be careful not to overmix.

By following these steps and tips, you’ll create a beautifully mixed batter. This will result in a delicious date nut bread.
Baking the Bread
Now it’s time to bake your homemade date nut bread. Baking is key to getting that perfect loaf. You need to pay attention to temperature and time.
Ideal Baking Temperature
The best baking temperature is 350°F (175°C). This ensures your bread is evenly baked. It will have a nice crust and a moist inside. Make sure your oven is preheated correctly for the best results.
How Long to Bake Date Nut Bread
The baking time depends on your oven and loaf size. A standard loaf usually takes 45-50 minutes. Check if it’s done by looking for these signs:
- A golden-brown crust
- A toothpick inserted into the center comes out clean or with a few moist crumbs
- The bread sounds hollow when tapped on the bottom
Here’s a simple table to guide you on baking times for different loaf sizes:
| Loaf Size | Baking Time |
|---|---|
| Standard Loaf | 45-50 minutes |
| Mini Loaf | 25-30 minutes |
| Large Loaf | 60-65 minutes |
Tips for Achieving the Perfect Bake: Make sure your oven is preheated right. Use an oven thermometer to check the temperature. Try not to open the oven door too often to prevent the bread from sinking or baking unevenly.
By following these tips, you’ll bake a delicious homemade date nut bread. Remember, it takes practice to get it just right. Don’t worry if your first loaf isn’t perfect. Keep trying, and you’ll soon be baking like a pro.
Cooling and Storing Date Nut Bread
Keeping your date nut bread fresh is important. After baking a tasty healthy date nut bread, it’s crucial to handle it right. This ensures it stays fresh and delicious.
Proper Cooling Techniques
After baking, take the simple date nut bread recipe out of the oven. Let it cool in the pan for 10 minutes. This helps it set and makes it easier to remove.
Then, move the bread to a wire rack to cool completely. This step is key to avoid sogginess from trapped steam.

As Julia Child said, “The only time to eat diet food is while you’re waiting for the steak to cook.” Enjoying your cooled date nut bread is a treat you shouldn’t miss.
Best Storage Practices
Store your date nut bread in an airtight container once it’s cool. It can stay fresh at room temperature for 3 days or in the fridge for a week. For longer storage, freeze it.
Wrap it in plastic wrap or foil and put it in a freezer-safe bag. To enjoy it again, thaw at room temperature or toast it.
By following these tips, you can enjoy your healthy date nut bread for days. It will stay moist and flavorful.
Serving Suggestions
Date nut bread is great for many occasions. It’s perfect for a quick breakfast or a sweet treat with afternoon tea. You can serve it in different ways to meet your needs.
Pairing Ideas
One easy way to enjoy date nut bread is with your favorite drinks. Here are some pairing ideas:
| Beverage | Pairing Suggestion |
|---|---|
| Coffee | Enjoy your moist date nut bread with a warm cup of coffee for a comforting breakfast. |
| Tea | Pair date nut bread with a soothing cup of tea, such as Earl Grey or Chai, for a relaxing afternoon treat. |
Creative Serving Options
You can also get creative with serving your date nut bread. Here are a few ideas:
- Use date nut bread as a base for French toast, adding a rich, custard-like flavor to your breakfast.
- Turn your date nut bread into a delicious bread pudding by cubing it, mixing it with eggs and spices, and baking until golden.
Exploring these serving suggestions can make your best date nut bread recipe even more special. It can go from a simple loaf to a versatile culinary delight.
Variations on the Classic Recipe
It’s easy to change the date nut bread recipe to fit different diets or tastes. You can make your homemade date nut bread gluten-free or vegan with a few simple tweaks.
Gluten-Free Date Nut Bread
To make gluten-free date nut bread, swap wheat flour for a gluten-free blend. Look for a mix with rice flour, potato starch, and tapioca flour. Also, make sure your baking powder is gluten-free.
- Use a 1:1 ratio for substituting gluten-free flour for regular flour.
- Add xanthan gum if your gluten-free mix doesn’t already contain it to help with texture.
- Be mindful of the ratio of liquid ingredients, as gluten-free flours can absorb moisture differently.
Vegan Adaptations
For vegan date nut bread, replace eggs and dairy with vegan alternatives. Use flax eggs or commercial egg replacers. Choose vegan butter or coconut oil instead of regular butter. Make sure your sugar is vegan-friendly, as some sugars are processed using bone char.
- Replace eggs with flax eggs or an egg replacer.
- Use vegan butter or coconut oil instead of regular butter.
- Check the ingredients of your sugar and chocolate (if using) to ensure they are vegan.
These changes let you enjoy easy date nut bread that suits your diet without losing flavor.
Troubleshooting Common Issues
To make sure your date nut bread is perfect, you need to fix common baking problems. These issues can happen when making this classic recipe.
Overcooked or Undercooked Bread
Many bakers struggle with bread that’s too hard or not done enough. To solve this, check your oven’s temperature often. Adjust the baking time if needed.
If your bread is not cooked enough, bake it a bit longer. But if it’s too hard, try baking at a lower temperature next time.
Ingredient Substitutions
At times, you might need to swap out ingredients because of dietary needs or availability. For example, you can use almonds or pecans instead of walnuts for a different taste.
When you change ingredients, especially in a classic recipe, keep the balance right. This helps the bread’s texture and taste stay good.
- For gluten-free versions, use gluten-free flours.
- For vegan options, flaxseed or chia seeds mixed with water can replace eggs.
Final Thoughts on Date Nut Bread
Making healthy date nut bread is a rewarding experience. It brings joy to you and your loved ones. With this simple recipe, you can create a delicious treat for any occasion.
The Benefits of Making Date Nut Bread
Trying out this simple date nut bread recipe is rewarding. You’ll enjoy a tasty homemade bread and benefit from wholesome ingredients. Date nut bread is full of fiber, vitamins, and minerals, making it a healthy choice for your diet.
Sharing Your Creations
After baking your healthy date nut bread, consider sharing it. It’s a thoughtful way to show you care. It’s sure to be a hit at any gathering. So, go ahead and try this simple recipe – you won’t be disappointed!
FAQ
What is the best type of dates to use for date nut bread?
Medjool or Deglet Noor dates are the best for date nut bread. They are sweet and have a rich flavor.
Can I make date nut bread without nuts?
Yes, you can make date nut bread without nuts. Just use seeds or dried fruit instead. This keeps the texture and flavor right.
How do I store date nut bread to keep it fresh?
Store date nut bread in an airtight container at room temperature for up to 3 days. Or freeze it for up to 2 months.
Can I make gluten-free date nut bread?
Yes, you can make gluten-free date nut bread. Just use a gluten-free flour blend and adjust the liquid content.
How do I achieve the perfect consistency for my date nut bread?
For the perfect consistency, don’t overmix the batter. Adjust the liquid and baking time as needed. This ensures a moist and tender crumb.
Can I customize date nut bread with other ingredients?
Yes, you can customize date nut bread. Try adding dried cranberries, chocolate chips, or orange zest for a unique flavor and texture.
How long does it take to bake date nut bread?
Baking time for date nut bread is 45 to 60 minutes. It depends on the loaf size, shape, and oven temperature.
Can I make date nut bread in a slow cooker?
Yes, you can make date nut bread in a slow cooker. Just adjust the recipe and cooking time for a tender and evenly cooked loaf.