Are you a fan of crunchy, savory snacks that bring instant smiles to any gathering? If so, you’ve landed in the right place. In this in-depth guide, we’ll explore how to create the best chex mix recipe oven style you’ve ever tasted. We’ll cover detailed ingredients, insider tips, delicious variations, and everything else you need for a perfect homemade Chex mix. Get ready to dive into a world of aromatic spices, crisp textures, and simple preparation methods that will make your snack table unforgettable.
We’ve all seen pre-packaged Chex mix at the grocery store. However, there’s nothing quite like baking your own. Indeed, the chex mix recipe oven approach lets you control flavors, ingredients, and crunchiness level. As a result, you can tailor each batch to match your taste, dietary preferences, and the occasion at hand.
Moreover, preparing homemade Chex mix in the oven is surprisingly simple. You don’t need advanced culinary skills. If you’ve ever been put off by complicated snack recipes, you’ll find relief in how straightforward this method can be. Simply combine cereals, nuts, and other mix-ins, then coat them with a tangy or savory seasoning. Finally, bake at a moderate temperature until each piece emerges golden-brown and delicious.
You may wonder why the chex mix recipe oven technique beats other methods, such as microwaving. It primarily comes down to texture and flavor. Oven heat:
Additionally, an oven-baked approach grants you more control over browning and crispiness. You can adjust the timing or heat to suit your preferences. Some people enjoy a lightly toasted batch, while others prefer a deeper golden hue. Regardless, an oven-baked approach yields a more consistent result than quick methods. In short, the oven process ensures your homemade Chex mix stands out from any store-bought variety.
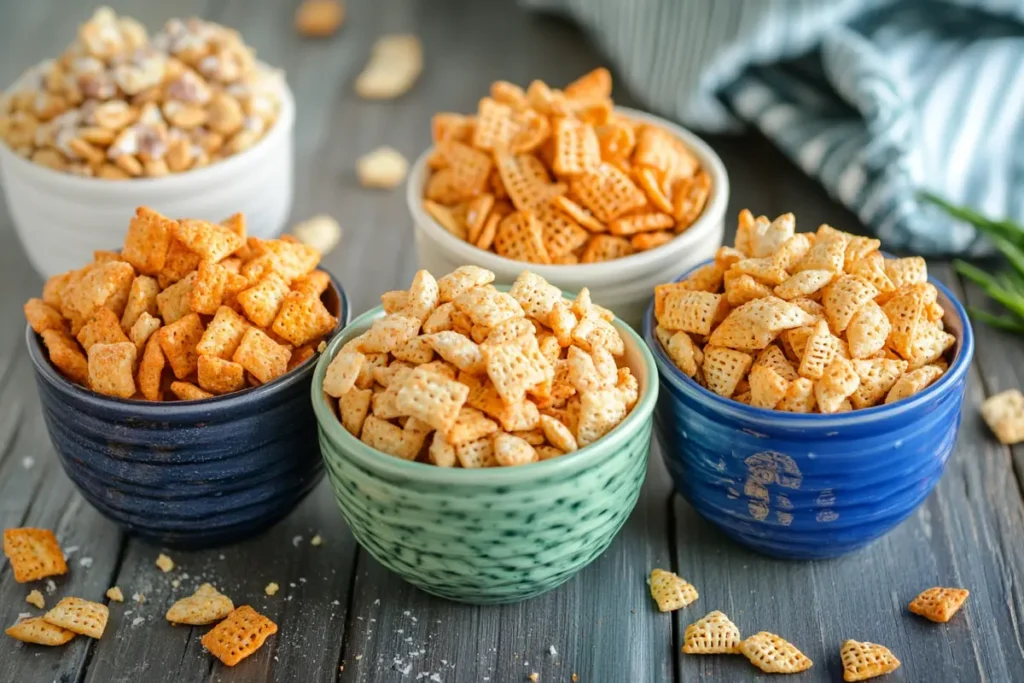
When discussing a chex mix recipe oven, we naturally think of Chex cereals. Three common types appear in traditional mixes:
You can also experiment with Cheerios, Crispix, or any square-shaped cereal that can hold seasonings well. For a more adventurous spin, try substituting some portion of your Chex cereals with a different brand or style. The cereal you choose heavily influences texture and taste, so explore freely.
Next, consider nuts, seeds, pretzels, bagel chips, or crackers. These secondary components bring additional crunch and flavor to your chex mix recipe oven. Common options include:
Feel free to swap in your favorites. Almonds, cashews, or even pistachios can add exciting twists to the final product. Similarly, gluten-free versions of pretzels or crackers exist, making it easy to adapt for dietary restrictions.
Finally, the seasoning blend holds everything together. Melted butter is often the go-to choice for binding spices and cereals. However, you can also use vegetable oil or olive oil if you prefer a dairy-free or lighter approach. Classic flavorings include:
Balancing these spices is crucial. Too little seasoning yields a bland mix, whereas going overboard can make it overly salty or spicy. Start modestly and adjust until it tastes just right. Achieving flavor harmony is a defining hallmark of any remarkable chex mix recipe oven.

Let’s walk through a tried-and-true process for making your own chex mix recipe oven at home. This basic version uses common ingredients and yields a tasty, crowd-pleasing snack.
After finishing, each handful should deliver a crisp bite saturated with savory seasoning. Because you stirred it regularly, you won’t find random bland spots. Keep in mind that oven temperatures vary, so always watch for signs of over-browning.
One big advantage of making your own chex mix recipe oven is the creative potential. If the classic route becomes routine, switch things up by adding different flavors. Here are a few ideas:
These suggestions only scratch the surface. Indeed, you can experiment endlessly with different seasonings, add-ins, and even cooking times. The more you practice, the more you’ll discover flavor profiles that match your palate perfectly.
A universal mistake is under-seasoning or over-seasoning your mix. Striking the right equilibrium is crucial. Here are a few pointers to help you fine-tune your approach:
This measured approach ensures that each handful of your chex mix recipe oven bursts with vibrant flavor. No one wants a bland or overly salty snack, so be strategic with each ingredient.
(Approx. Word Count: 880 words so far.)
Imagine hosting a birthday, housewarming, or movie night. A big bowl of homemade Chex mix becomes an instant hit. Guests love the nostalgic familiarity paired with fresh, from-scratch taste. Pair it with cold beverages or simple dips, and you’ve got a party snack that keeps people gathering around the snack table.
Many families reserve the chex mix recipe oven process for holidays like Thanksgiving or Christmas. The warm, buttery aroma filling the kitchen evokes cozy memories. Moreover, you can customize the mix to fit seasonal themes. For instance, add red and green candies for a festive Christmas version or incorporate pastel-colored cereal for Easter brunch gatherings.
Sports fans often want something crunchy to munch on while rooting for their favorite teams. Chex mix fits the bill perfectly. Because you can easily double or triple the recipe, it’s simple to feed a large crowd. Moreover, you can make different flavor batches—mild, spicy, or sweet-savory—so everyone finds something they enjoy.
Who says you need a special reason to whip up a chex mix recipe oven batch? Sometimes, you just crave a crunchy snack for a mid-afternoon pick-me-up. By keeping a container of homemade Chex mix on the counter or in your pantry, you’ll always have something to grab when hunger hits. Because you control the ingredients, it’s often more wholesome than processed bagged snacks.
Even the best cooks can face hiccups. Here are typical issues you might encounter and solutions to save your chex mix recipe oven from disaster:
Understanding these pitfalls helps you avoid repeated mistakes, ensuring your homemade Chex mix meets or surpasses your expectations every time.
We often view Chex mix as a decadent treat. Still, you can adjust the recipe to suit healthier lifestyles:
Implementing these tips can make your chex mix recipe oven not only delicious but also more nutritious. You’ll still enjoy the iconic crunch while being mindful of dietary preferences or goals.
Rather than filling one giant bowl, portion your chex mix recipe oven into individual cups or mini paper bags. This method helps guests easily grab a serving at parties. It’s also great for children’s gatherings, where single servings reduce mess.
For an eye-catching snack spread, incorporate color-coordinated candies or sprinkles. If you’re celebrating a team victory, find candies matching the team’s colors. During holidays, use red, green, or pastel shades for seasonal flair.
Homemade Chex mix can become a thoughtful gift. Fill mason jars with your signature batch, then decorate with ribbons, labels, or gift tags. This approach proves both cost-effective and personal. You’ll likely see grateful smiles when someone receives a jar of your custom chex mix recipe oven delight.
If you often find yourself hungry during road trips or at work, bag up small portions. Store them in your car or desk drawer. Unlike some perishable snacks, Chex mix remains fresh and crispy for about two weeks when properly sealed.
Storing: To maintain maximum freshness, let your baked Chex mix cool entirely. Then, place it in airtight containers or heavy-duty resealable bags. Ideally, keep it in a cool, dry area. High humidity might soften the cereal, affecting its crunch.
Shelf Life: Your homemade chex mix recipe oven typically stays crunchy for up to two weeks. However, it rarely lasts that long in most households!
Reheating: If you find it has lost some crunch, spread it onto a baking sheet and warm it at 250°F for 5–10 minutes. Keep an eye on it to prevent accidental browning. Afterward, let it cool down again to regain that irresistible crispiness.
(Approx. Word Count: 1,690 words so far.)
By fine-tuning details like ingredient freshness, baking sheet spacing, and flavor timing, you’ll cultivate a custom approach that makes your Chex mix truly extraordinary.

Many Chex cereals come in gluten-free versions (e.g., Corn Chex, Rice Chex). Double-check labels for hidden gluten in seasonings or pretzels. You can find gluten-free pretzels and Worcestershire sauce formulated without wheat. Adjust accordingly, and you’ll have a tasty snack that meets gluten-free needs.
Want to avoid dairy or other animal products? Use plant-based butter or a neutral oil like grapeseed. Opt for vegan Worcestershire sauce, which omits the anchovies found in traditional formulas. This approach ensures your chex mix recipe oven remains 100% plant-based but no less flavorful.
Reducing carbs means swapping out cereals high in starch. While this might seem counterintuitive, you can build a “chex mix” vibe with pork rinds, almonds, and keto-friendly crackers. Keep the same savory seasoning approach, but watch the macros for each ingredient. This version won’t taste exactly like the original, yet it still satisfies cravings for a crunchy snack.
Although this is a text-focused guide, if you have the opportunity, taking photos or short clips of each step can help visualize the chex mix recipe oven process. You can snap images of:
Sharing these visuals on social media, or just referencing them in a personal scrapbook, can help others replicate your success. Sometimes, a single photo of that glistening, baked Chex mix is all it takes to persuade friends or family to try making it themselves.
(Approx. Word Count: 2,120 words so far.)
Exploring these bits of trivia can bring a sense of connection to the snack you’re making. You’re taking part in a culinary tradition that has delighted generations and continues to spark joy at gatherings.
(Approx. Word Count: 2,250 words so far.)
Toss in additional unsalted cereal or nuts to balance it out. Alternatively, make another half-batch without salt and combine them.
Yes, but be cautious about fresh cheese melting. Powdered cheese or cheese crackers are safer for preserving crispness. Add real cheese toward the end if you must, then watch it carefully.
Drop the temperature by 10–20 degrees. Also, stir more often. If your oven frequently overshoots, invest in an oven thermometer to confirm accurate temps.
Freezing can affect texture. While some do freeze it successfully, you might lose some crispness upon thawing. If you must freeze, seal it carefully, and re-crisp in the oven before serving.
Add sweet components—like chocolate or dried fruit—after the mixture has cooled. This approach protects them from heat and keeps sweet flavors distinct rather than caramelizing onto the cereal.
(Approx. Word Count: 2,400 words so far.)
You’ve now explored every nook and cranny of a stellar chex mix recipe oven journey. You understand which cereals to choose, how to mix the seasonings, how long to bake, and even ways to adapt the recipe for different diets or occasions. While it may seem like a simple snack, homemade Chex mix offers endless flexibility, allowing you to express your creativity in both taste and presentation.
Most importantly, do not be afraid to experiment. Add different nuts, try a dash of hot sauce, or sprinkle in unconventional herbs—this snack thrives on innovation. Whether you’re serving it at a laid-back gathering, a holiday feast, or simply keeping a bowl around the house for quick munching, it’s certain to delight. Your carefully baked, savory mixture will set the bar high for all other snacks, leaving both friends and family asking for your secret.
In conclusion, the secret lies in balancing flavors, baking at a gentle temperature, and stirring regularly to ensure each piece remains crisp and perfectly coated. Once you master the foundation, the possibilities expand infinitely. So gather your favorite cereals, heat the oven, and start experimenting. May every bite of your chex mix recipe oven be as bold, crunchy, and memorable as you desire!
For more recipes:Biscuits and Gravy – Classic Southern Comfort